I've had to make a few 'Thank You' cards for people with a range of interests.
Translate
Friday, 1 August 2025
Thank You Cards
Friday, 17 March 2023
Hand Made Flowers, Frame and Stitching
I recently treated myself to a couple of the discontinued Elizabeth Craft/Susan Tierney Cockburn die sets, and I wanted to make something a little different with them. One of the sets is actually an oval nesting set, but with some bigger dies than I have. I got the original sets of Spellbinders Nestibilities, but the problem with them was always that the format was too small. I think their US bias got stuck on that odd 'A2' size card they use which isn't standard anywhere else. So, even for A6 cards, their dies just didn't look quite right. But enough of that.
The first part of the project was to cut out the frame elements. For them, I used an Elizabeth Craft die I've had for some time. It's smaller than I'd like, so I stretched the pieces to approximately 9 and 11 inches long giving me a frame with a 7 by 9 inch aperture. I always get it wrong when I do this - one piece of card ends up in the bin during the process, and this time was no exception.
Because the black card I used isn't the best quality, I reinforced the underside of the front panels with strips of the same black card before pricking out the stitching pattern. The pattern I used came from a book I've had for many years called The Art of Decorative Paper Pricking by Janet Wilson. It's not really intended for stitching, and it's not even one of the patterns in the book - it's actually used as page decoration. But, with a little resizing in Photoshop Elements, I got it to a suitable size, and printed out a strip for each frame edge. I used Sulky Blendables to stitch the pattern.
Another recent (bargain) purchase, is the embossing folder I used here. I don't use A4 embossing folders often, but when you want to emboss a bigger area, smaller ones won't do the job. I got his folder (from Crafts Too) at Crafterama at Ally Pally last weekend. I embossed a bit of Coredinations Whitewash card I've had for ages. (I don't even know if it's still on the market.) I sanded the surface after embossing. I had to add another layer of card behind the Coredinations as it was a bit floppy - especially after embossing.
The next stage was to cut some corners for the frame (Spellbinders die - it's one of their debossing range that never really took off. I definitely found them very hard to cut with - fortunately, there's not much actual cutting needed for this corner die. I then cut another piece of the satin gold card and used the Elizabeth Craft oval die to cut the aperture. I then embossed the gold card using the same folder, and attached it with foam pads doubled up for extra height.
Then, I got to the really fun part. I cut pieces for three dahlias in white card and coloured using Promarkers. I added some striping (white on the shocking pink flower and magenta on the yellow) using fine Posca pens. The peach coloured flower has some added magenta promarker added to the petal tips for a bit of added colour.
That's about that!
A little word about Ally Pally last weekend. It was the first time I've been back since Covid lockdowns, and, of course, since it changed ownership. I think it's a real shame many of the exhibitors who used to go to Ally Pally haven't continued. Craft shops in London are pretty much limited to Hobbycraft - especially since Blade Rubber Stamps closed down. It's strange that such a large conurbation can't support a bigger show than this. I know it's probably more expensive because of generally higher London prices, but it's a real shame. Having said that, I did buy a few bits, and it was lovely to see a stall with just Aall and Create which was definitely something new for me. Unfortunately, my daughter wasn't well enough to come with me :(
Monday, 20 February 2023
A Special Birthday Card
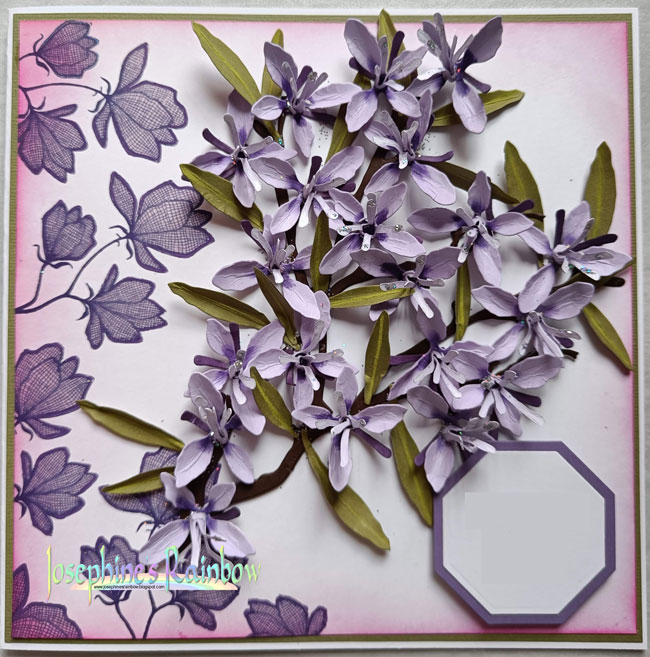
I had to make a card for a special birthday. I'd seen someone using the Lavinia Lillium stamp as a partial background recently - I think it was on the Lavinia group on Facebook, but I wasn't planning on using it when I saw it, so I didn't not the originator. Anyway, that's how I started.
I made the card base approximately 8in square, and I've created a vine effect with the Sizzix/Susan Tierney Cockburn Beeblossom die, along with a couple of other branch dies from other Susan Tierney Cockburn set from other manufacturers. I coloured the flowers with Promarkers, adding some detail with Pan Pastel. The leaves were made using olive green card. I stamped the Lillium with Versafine Clair ink, and coloured the blooms with Promarker, then outlined them with an fine Posca pen. You can't see it in the photo, but I finished the flowers by adding a layer of clear glitter marker (Crafter's Companion). I created a suitable sentiment in Photoshop Elements and cut it and a mat with a Spellbinders die set. The stamped area was shaded with Distress Ink in Tattered Rose and Spun Sugar. I added a darker shade around the whole edge using Picked Raspberry (which I originally misread as Pickled Raspberry, and that's how I always think of it!) I've digitally removed the sentiment for the photo.
I made a couple of insert pages using similar techniques.
Beeblossom is quite a dimensional flower, so there's no way this card was going into an envelope. Therefore, the next stage was to make a box. I used 12 by 12 white card to make a basic lid and tray box which I decorated to match the card. Again, I've digitally removed the recipient's name.
I added an oval label area with a mask, and a little background texture with Tattered Rose ink and a Lavinia stencil.
Sunday, 23 October 2022
International Art and Soul Challenge 145
This fortnight's theme was set by my time mate Debbie, and she wants to see Autumn-themed projects.
When tidying my craft space recently (I know, and it wasn't much tidier when I finished!) I came across a background I made some time ago and didn't use for some reason. It was perfect for this theme, so I used it as a starting point and came up with this:
Sunday, 22 May 2022
International Art and Soul Challenge 134
It's my turn to choose the challenge theme for this fortnight, and I've gone for one of my favourites, and I hope it'll be something you find fairly easy too. I want you to Say it with Flowers!
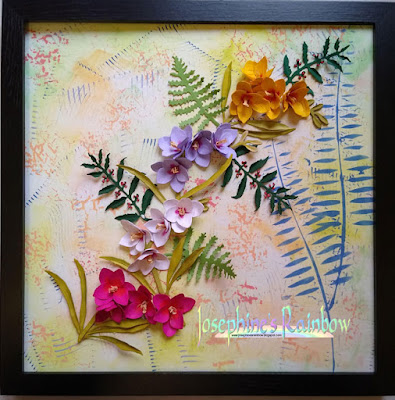
I first started following Susan Tierney-Cockburn when I got her book showing how to make realistic flowers from punched shapes. I've still got a box of punches, many of which were bought specifically for that purpose. Snowflakes make pretty good calixes! But dies are much easier, and I've been collecting her dies since her first collection with Sizzix. I haven't bought too many of her more recent collections largely because there have been a lot of repeats, but the one flower I've been waiting for is the freesia. Not only do I love the perfume from those, but it was my mum's favourite flower. So, when I spotted freesia among the latest Spellbinders collection, I had to get it.
The frame is 12in square, and due to a miscalculation, I've had to leave the glass out as the flowers are a bit too three-dimensional! But the result is intended to be a placeholder until I can finish a piece of blackwork to go with one I've already completed. Anyway...
The background was made using Distress Oxide, and I blended, stencilled and used a rubber texture spatula to create the various effects. The flowers are ll freesia, and I've added some more of Susan's foliage to the arrangement. I used green card for the foliage, but the freesia (and their own leaves) used white card that I'd coloured with Promarkers, and added further detail with Pan Pastels. I love how freesia can have different colours, so that's what I went for here.
I'm looking forward to seeing your flowers, whether they're stamped, drawn, die cut, clay, wire, or however else you want to make some flowers.
Sunday, 24 April 2022
International Art and Soul Challenge 132
This fortnight's challenge was set by my team mate Christine, and she's chosen the theme Things with Wings.
My first thought was Lavinia silhouettes, but then I had a change of direction, and got out my Ching Chou Kuik/Sweet Pea stamps.
It's a long time since I've used these stamps, and I've done very little colouring of late, so I honestly didn't expect a lot.I stamped the image with Versafine Clair and coloured mainly with Promarkers. I added the candle glow with coloured pencil to take advantage of their opacity. I was pleasantly surprised by the result, and, of course, those gorgeous blues and greens are among my favourite colours. I softened the background using a peach hued coloured pencil, but that hasn't come out at all in the photo.
I used an 8in card, so I matted and layered as shown, including a couple of layers of holographic silver to go with the tiny bit of Glamour Dust I used on the image.
The background was created with Distress Ink and a Lavinia stencil, and then stamped with Versafine Clair and a couple of Lavinia stamps - both 'orbs'.
To complete the card, I die cut more of the holographic card using a very old Sizzix die - you know the thinner plastic ones? I rarely use these, but this one giving a foot long result was perfect for this bigger card.
And that's it.
I do hope you can join us this time.
Sunday, 13 March 2022
International Art and Soul Challenge 129
My team mate Jennie has set the challenge for this fortnight, and she wants to see Easter Chicks or Rabbits.
I had to think about this one, as I don't have any stamps that would work well for this. And then I had a look at my digital stamps and found the perfect one! It's from Phindy, and I know I've had it for many years, and I suspect it was a freebie at the time, but I honestly can't remember.
Isn't it a sweet image? Anyway, I coloured the image with Promarkers, although I added fine detail with some fineliner pens. I added a little shading with pencil, and background colour using Distress Ink. The image and mat were cut using Tonic dies.
The background uses more Distress Ink and a Clarity Stamp stencil. Finally, I added a sentiment with a Woodware stamp and Versafine Clair ink.
I do hope you can join us this time.
Sunday, 30 January 2022
International Art and Soul Challenge 126
The theme for this fortnight has been set by my team mate Debbie, and she wants to see your creations on the theme of: All About Love/Hearts.
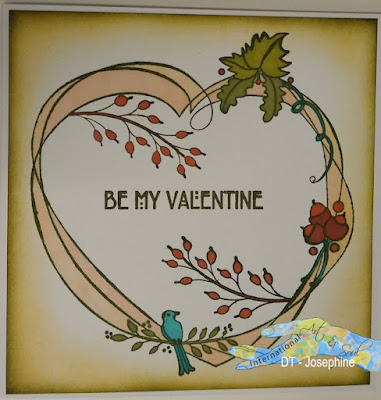
I started with a stamp from Clarity. It's one of their seasonal wreaths, and the Autumn one is this heart-shaped one. I added some extra leaves from the same set, and a sentiment which is also from Clarity. I added colour to the stamped image using Promarkers, and the the edges using Distress Ink.
A simple card for my oh who prefers things which are on the simple side.
I do hope you can join us this time.
Sunday, 7 November 2021
International Art and Soul Challenge 121
The challenge for this fortnight was chosen by my team mate Sall, and she wants projects on the theme of Remembrance.
That's a very appropriate theme for this time of year, but I found it hard to come up with a project that I could actually use. It's not normal to send cards for Remembrance day, and while people wear poppies, making your own kind of defeats the purpose of poppies as a way of making money for the Royal British Legion. So, my project has poppies, but no specific mention of Remembrance, beyond the fact that sending someone a card is a sign that you're thinking about them.
I started with Claritystamp stamps. The image and text are from the beautiful Art Deco range, and have the added benefit (from my point of view) of being stained glass style, so they represent two of my favourite styles immediately.
I stamped the image with Versafine Clair, then coloured with Promarkers, although the very narrow borders were coloured with water-based fine liner pens. I simply cannot get Promarkers to behave in that sort of very narrow space. I know they used to supply fine tips for the pens and these were great, but quickly became clogged and unusuable. It's such a pity they couldn't make those work.
The background started with Distress Ink applied to white card. My thinking was a kind of 'out of focus' poppy field, but I'm not sure how well that worked out. I took the result and embossed it with an Embossalicious folder. Then, I used black Distress Ink to pick out the raised areas.
I matted the image on red and then black card, and the background on black, and that's it. I considered adding something (like some poppies) but decided it worked well enough without.
I do hope you can join us this time.
Sunday, 10 October 2021
International Art and Soul Challenge 119
The challenge for this fortnight was set by my team mate CG and she wants us to use mainly yellow and orange. That seemed like an ideal opportunity to make something bright and cheerful, and this is what I came up with:
First, the background is stencilled using Crafter's Companion layering stencils and Distress Ink. The main image was stamped in Versafine Clair ink using a Woodware stamp. I coloured the image with Promarkers, added layering as shown. I used a corner rounder on the image and mat - with a wider corner on the bottom than the top, as I thought that worked for the image. The metallic orange band is an offcut I've had for many years - I originally had a few sheets in a 'Payperbox' selection I bought, I think, at Olympia when there used to be an annual craft show there, before it became just for knitting/and sewing. So, a long time! The flowers are from a length of floral lace I bought, also many years ago.
I do hope you can join us this time.
Sunday, 29 August 2021
International Art and Soul Challenge 116
This fortnight's challenge is hosted by my team mate Chriss, who's chosen the theme Birthday.
I started with a Nellie Snellen stamp. I liked it when I saw it on a website, and loved it when I stamped it. I coloured it with Promakkers and cut it using a Tonic die and matted it on gold mirror card cut with a Spellbinders die. The sentiment was stamped using a pre-inked stamp I've had for many years and cut with a Sizzix die. The background was created with a gell press background of distress ink. To that, I added some feathers from a Pretty Quick stamp set and added some further texture using a text stamp from Printable Heaven. For that, I used a mixture of Distress ink and Versafine Clair.
I hope you can join us this time.
Monday, 7 December 2020
A Christmas Card
I made a Christmas card using an stamp from Woodware that I coloured with Promarkers. I added a stitched frame. I pierced the holes using a template I recently got which is actually intended for pricking holes in leather. There are some basic frames and a grid of holes too, although because it's intended for robustness, it's about 5mm thick and therefore quite hard to hold in place. Having said that, it worked fine for this frame. I completed with a layer of mirror card and I embossed the base card with snowflakes to add a little more texture.
Monday, 23 November 2020
International Art and Soul Challenge 97
The challenge for this fortnight is to make something with lots of pink. If you're like me, this time of year is spent making things either red/green/gold or cold, wintery colours like blue/lilac/grey. So, pink is a chance to do something a bit different! Here's what I came up with:
So, it's a Christmas card, but a rather understated one. In fact, the only specifically Christmassy thing about it is the backgroud paper which has the names of lots of Christmas carols. I used a Julie Hickey stamp and die set, stamping the image on to white and colouring with Promarkers. Then, I stamped twice more on to pink card and used the dies to cut the top layer twice more, and the central bit once. I used Versafine or Versafine Clair ink for the stamping - Olympic Green for the bottom layer and Charming Pink for the die cut layers.
And that's it. I do hope you can join us this time, and I'm looking forward to seeing your pink creations!
Sunday, 27 September 2020
International Art and Soul Challenge 93
I recently added to my collection of Brushos, and several of them seemed to be earth tones, so they seemed to be an ideal starting place for this challenge. I used several colours, and stamped over the result using Versafine ink. The result was two pieces of backing card for six by six inch cards.
The predominant colours in this part were more the dark green and red, and again, I wanted to lift the overall effect. The image was stamped using an Indigo Blue stamp, and coloured with Promarkers. The lace is some of the 'stick on' variety that I got in Tiger (at least that's what it was called when I bought it!)
Stamps used in the background are from Poppy Stamps, Crafter's companion, and an issue of Creative Stamper magazine.
I do hope you can join us this time.
Sunday, 13 September 2020
International Art and Soul Challenge 92
Monday, 31 August 2020
Crafty Cardmakers Challenge 262
I have often seen waterfall cards and fancied making one, so I went in search of a tutorial and found this one. It allows for six layers in the waterfall, and I decided to get out my Ching Chou Kuik stamps to fill it.
I left the front fairly plain as a contast to what's inside.
The images were all stamped in Memento ink and coloured with Promakrers using a fairly limited range of colours in coral and teal. I edged each image with a die cut and assembled following the instructions on the video.
I must say I'm quite pleased with the result and will probably make more of these!
I do hope you can join us this time.
Sunday, 30 August 2020
International Art and Soul Challenge 91
I do hope you can join us this time.
Sunday, 2 August 2020
International Art and Soul Challenge 89
I coloured the pot and cup in the central image with Promarkers. I printed out the stack of cups quite big and coloured them too. Then I scanned the result and tiled it in Photoshop Elements to make a background. Of course, at the time I'm writing this (late May) we're still pretty much being told to stay at home, and the idea of sitting with a cuppa chatting on Skype is becoming the new normal, so the sentiment seemed natural. I finished the card with a teacup embellishment cut using the aforementioned Crafter's Companion dies.
That's it. I do hope you can join us.
Monday, 18 May 2020
Crafty Cardmakers Challenge 257
I started with a Woodware stamp. I've bought quite a few of theirs recently - such lovely designs. I coloured the butterfly and a couple of small details on the image with Promakrers. Then, to give it a vintage appearance, I shaded the background with Distress Ink before matting on to some mirror card. The background paper is from a pad I bought second-hand from a friend who was giving up cardmaking. I'm not sure whose it was, but it's an odd size of sheet (maybe 6" by 8", so I suspect it was made for the US market. But, the papers are lovely, and the colours gentler than I'm usually drawn to. I finished the card with a die cut butterfly, cut using a couple of Spellbinders dies.
I do hope you can join us this time.
Sunday, 15 March 2020
International Art and Soul Challenge 79
I decided to go for something that seems quite spring-like, and came up with this:
I first heard of Susan Tierney Coleman when she published a book showing how to make realistic flowers out of punched shapes. I then followed her when she turned to die cutting - first with Sizzix, then Elizabeth Craft and most recently with Tonic, and I've used mainly her dies to create the arrangement above.
I started with some card which I tinted with Distress Oxide ink in a variety of green shades. Then, I stamped a floral trio repeatedly and heat embossed.
The dies include the Japanese Fern and Galvanized Tub from Susan's most recent Tonic collection, along with Dogwood and Gerbera Daisy from the original Sizzix range. I've also used a few leafy sprigs that came from The Works. I shaded petals in a pale blush pink using Pan Pastel and added a slightly stronger colour to the edge of the dogwood petals using Promarker. To complete the flowers, I dabbed some glue on the stamens and sprinkled some magenta shaded glitter.
I do hope you can join us this time.